How do I Setup Custom Layers?
- Disaster Science
- Bushfire.io business
- July 4, 2025
Table of Contents
Custom Layers lets Business and Enterprise subscribers create and manage their own data layers—perfect for situational awareness, internal operations, or tailored overlays. You can customise how each layer looks, who sees it, and when you’re notified about relevant events nearby.
Info
Requires a subscription to Bushfire.io Business or Enterprise.
🛠️ This guide covers the full process from setup, to visualisation, to notification.
For larger Enterprises we also offer access to our data APIs to integrate incidents in their own systems.
1. Getting Started with Business Access
Before you can create custom layers, you’ll need to:
- Subscribe to a Business or Enterprise plan.
- Complete your organisation setup (see next section).
If you’re not on a Business plan yet, Contact Us or explore our Business Plan.
2. Create Your Organisation
Once subscribed, you’ll be prompted to create an Organisation. This is the space where your custom layers, users, and settings are managed.
- Navigate to My Organisation > Create Organisation

- Choose a name for your organisation

- Invite other team members (covered in a separate guide)
3. Upload Custom Icons (Optional)
You can upload custom icons for use in your layers—these help standardise your visuals and improve clarity for your team.
Warning
Uploaded icons are not access-restricted. Icons aren’t indexed or listed, but they can be accessed publicly if someone knows the URL. Avoid uploading any sensitive, confidential, or internal-use-only imagery."
- Navigate to My Organisation > Settings

- Maximum size: 2MB. Supported formats: PNG, JPEG and WebP. Icons larger than 256x256 will be resized.
4. Create a New Layer
Now it’s time to create your first Custom Layer.
- Go to My Organisation > Layers

- Select the ➕ or Actions > Create new Layer

- Your layer will be created, with a placeholder name (New Custom Layer). From here, you can begin configuring how the layer appears and who can access it.
5. Configure Layer Settings
You can adjust the name of your layer, which regions it’s available in and map visibility.
- If you’re not already there, go to My Organisation > Layers > Select a Layer >Layer Settings.

- Update the name of the layer (e.g. Universities) and then select Update Settings.

- You can also toggle which regions the layer is visible in, if the layer is visible/hidden, and if it is turned on/off by default.
Setup Layer Access
From the same Layer Settings view, you can update who can access your layer.
You can add individual users (read-only), add managers (read and write), and link licences. We suggest linking licences as it usually makes the layers easier to manage. Pro licenced users will have read-only access, whereas Business licenced users will have read-write access. If you don’t add anyone, only you as the owner/creator will have access.

Setup Layer Rendering
Layer rendering controls how your data is shown. In most cases, your data will be made up of Points (dots on a map, like a point-of-interest) and Polygons (areas-of-interest on a map).
By default, we create two map layers for your Custom Layer. One Layer may typically be used for Points, and another used for Polygons.
This step allows you to visually align your layer with your operational needs.
| Geometry Type | Examples in Bushfire.io | Description | Supported Style Types |
|---|---|---|---|
| Point | Incidents/Warnings (Symbol) | Single points of interest, such as a shop | Symbol*, Circle* |
| Polygon | Incidents/Warnings Area (Fill) | An area of interest, such as a large property or forest | Symbol, Fill* |
| Circle (actually a Polygon) | Hotspots, Lightning (Circle) | A single point of interest, with an area of interest around it | Symbol, Circle*, Fill |
| Line | Closed Roads (Line) | A corridor of interest | Line*, Fill |
(*) Best option to use for geometry type. Tip: You can switch between geometry types per feature in the Map Editor.


Other configuration options:
- Name: This is a reference you’re free to update, it may help you quickly look at the layer rendering and know what is setup.
- Refresh Frequency: In seconds, how often should the layer be refreshed. Not required if your data doesn’t update frequently.
- Visible: If the layer is shown or not.
- Minimum and Maximum Zoom Levels: How far you’re zoomed in to see the layer.
- Icon Size Ratio: How big should the icon be.
6. Add or Upload Your Data
There are two ways to add data to a custom layer:
Option 1: Use the Map Editor
This process is usually broken into two steps. Drawing the geometry, and then adding a ‘Title’ and ‘Body’.
- Go to My Organisation > Layers > Select Layer > Launch Map Editor
- Zoom into to a location of interest.
- From the right menu, select Line, Point, Circle, or Polygon to draw geometry around your place-of-interest.

- Select Add to begin adding information, or Remove to remove the POI.
- Enter a title and then save the feature.

Option 2: Upload GeoJSON
Upload GeoJSON via Layer Settings.
- If your documents contains GeoJSON Features with
titleandbodyproperties, those fields will be shown when a user clicks on them. Simple HTML is supported in the body.

- If your documents contains GeoJSON Features with
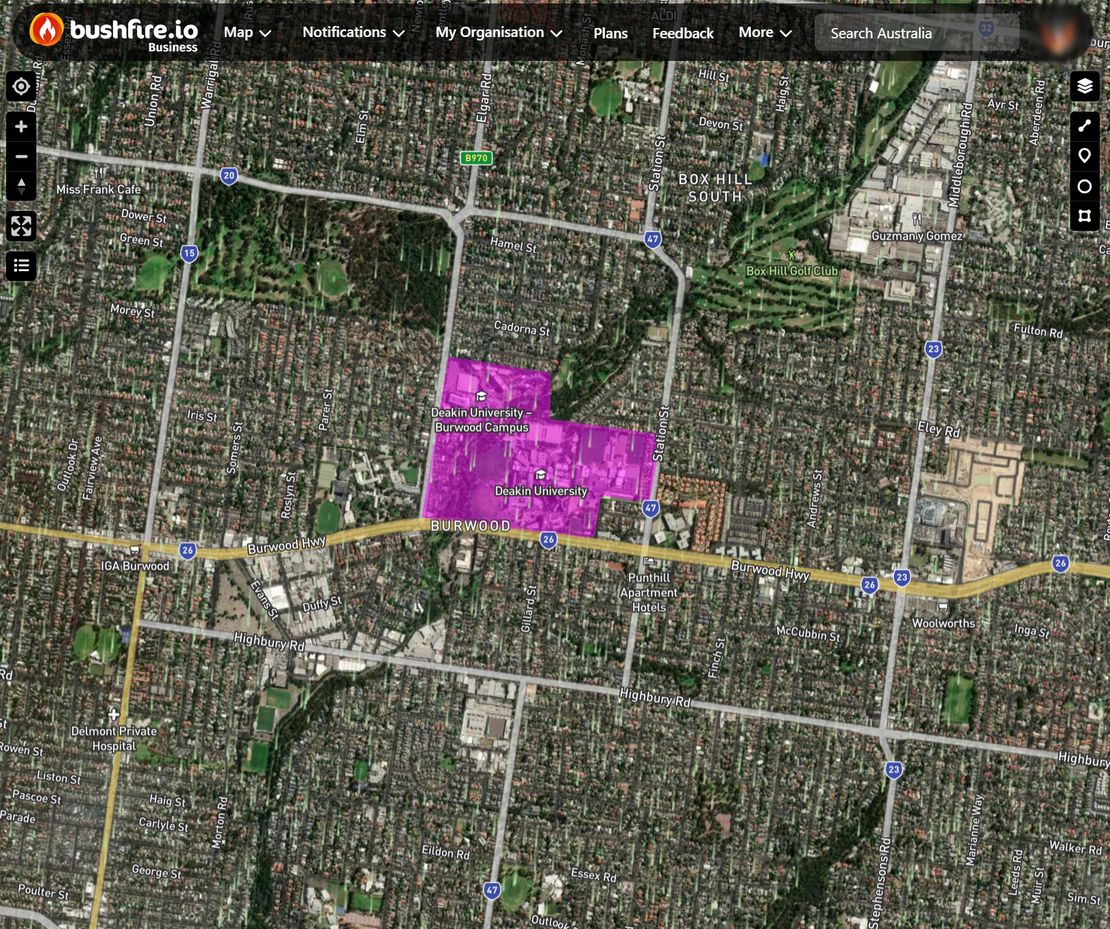
7. View the Layer in Bushfire.io
Once you’ve added your data, and setup how you’d like it to be displayed, you can now see it on the main map.
- Open the main Bushfire.io map
- Your data will be rendered alongside our core data (fires, weather, etc.)
Layers respect your access controls—only users in your organisation or specified groups will be able to see them.

8. Set Up Notifications
Custom Layers can generate notifications when incidents/warnings are detected close to your points-of-interest. This is ideal for asset protection, field ops, or incident tracking.
- Head to My Organisation > Layers > Select Layer > Launch Map Editor
- Create a new notification.

- Select which user you’d like to generate the notification for.
- Setup the notification to meet your preferences. If you have many points-of-interest, it may be useful to limit the radius to a few kilometres to avoid unnecessary alerts.


What’s Next?
- Managing Users and Licence Groups
- API Access for Developers if you’re looking to automate updates to your points-of-interest.
Need help setting up your first layer? Contact support — we’re happy to assist.